Honda Odyssey Forum banner

Rat/Mouse chew your Knock Sensor. How to replace w/ pictures Minimal tools required

82K views 30 replies 15 participants last post by  WaltH  
#1 · (Edited)
This has happens to Odyssey owners and the price to have it done at the dealer ranges from a couple hundred to over $500 depending on the dealer and their labor rate.

This instruction will help show you how to replace it yourself and keep some of that $$$ in your pocket. Which we all could use a little bit more off these days.

Pictures are from my 08 Odyssey but the steps are similar on the older v6's

DISCLAIMER: these instructions are provided as a guide. No expressed warranty or liability is implied. Working around an automobile can be dangerous and safety precautions should be followed to prevent injury.

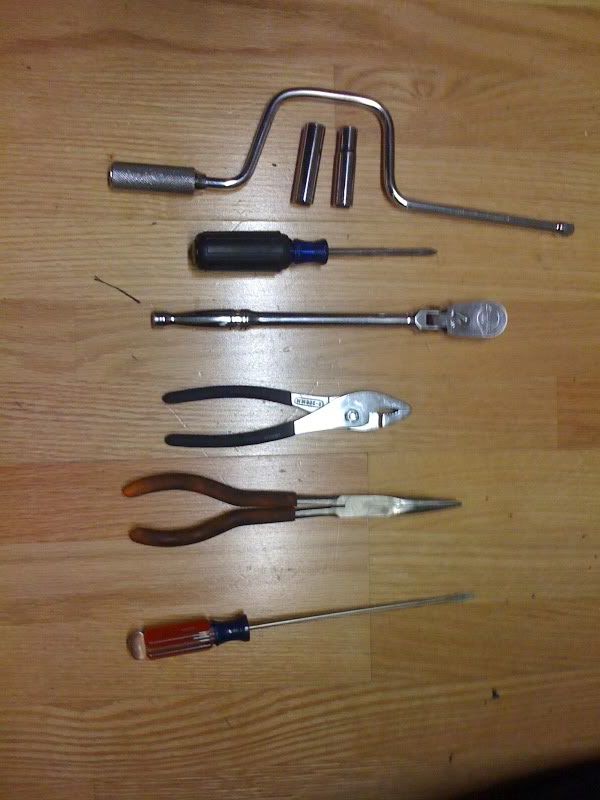
Tools you will need will be similar to those in the picture. Not all will be required but the ones pictured is what I used to do the job

1 x 10mm socket can be deep but a short one would work as well

1 x 12mm deep socket

1 x ratchet

1 x long nose plier (option but can be helpful in pull the release tab on the connector on the knock sensor) Long flat head screwdriver will work as well

1 x Phillips screwdriver

Image


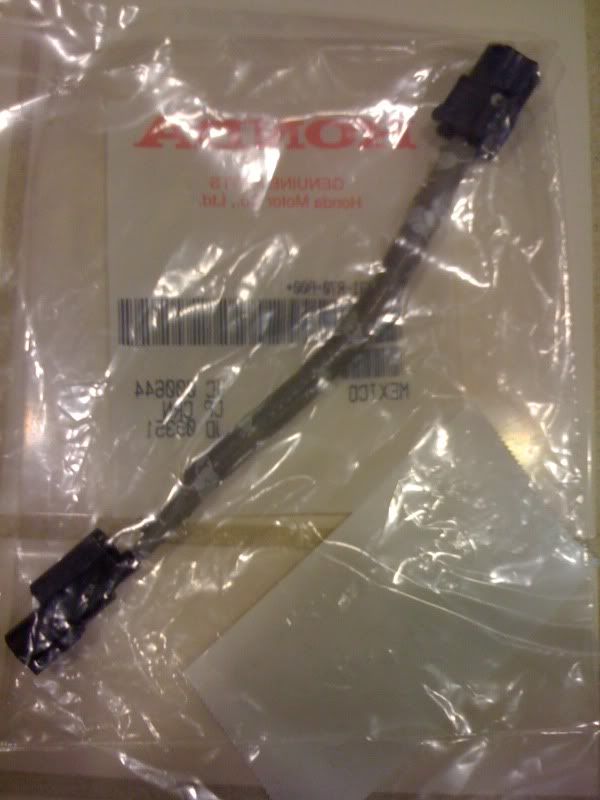
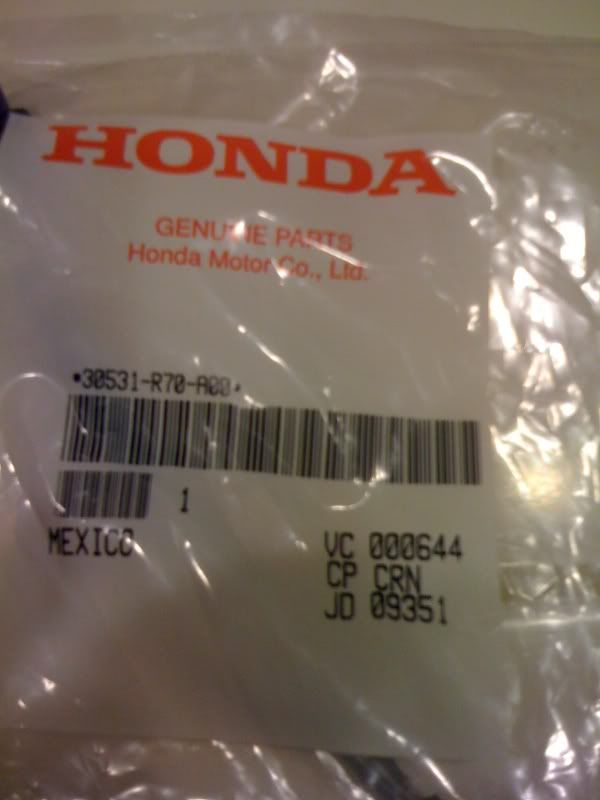
New replacement wiring harness. Cost $10 from the dealer rarely in stock. Price may vary from dealer to dealer.

Image
Image


Depending on your mileage you won't need to replace the intake gaskets as the newer ody's used metal and rubber gaskets. You can replace them if you'd like but it's optional.

Open the hood to 90 degrees. You will see a 2nd hood prop insertion opening along the left side of the hood near the bottom.

Disconnect the battery to prevent any shorts and to prevent anyone from starting the car while you work on it. This will also clear the check engine light that was triggered from the knock sensor which you'd have to do after anyways.

Remove the plastic cover that is installed on top of the intake to expose the intake. This is held on by 2 plastic clips on the front and friction pins on the back. Turn the screws 1/4 turn and pull up on the cover.


You should now have the aluminum intake visible as seen in the picture below.

Image
 
#2 · (Edited)
Using the phillips screwdriver loosen the hose clamp attaching the rubber intake coming from the air box to the intake manifold.

Disconnect the black connector on the top of the throttle body and the one on the back side. There will also be one vacuum hose and one coolant hose located on the bottom side of the throttle body near the intake

Image


Disconnect the 1 vacuum hose on the front left corner of the intake close to the power steering pump

Image


remove the small plate in the center of the intake held on with the small 10mm bolts and 2 nuts 12 total.

Image


Save all those bolts you will need them to reassemble. Once all those are removed pull up gently on the cover to expose the internals of the intake.

when looking into the intake you should see a mix of small and large bolt heads inside. You will need to loosen and remove the larger 12mm bolts.

Image


Once those are removed and all the hose are disconnected pull up on the intake to remove it and expose the intake runners.

Image


I took some tape to cover the runners to prevent any foreign debris from falling into the exposed openings.

Image


on the left side by the power steering pump you should see the knock sensor connector.

Image


Looking down between the openings of the front intake runner you should see the knock sensor and plug down below. I was able to reach the release for the clip using the long nose plier but a long flat screwdriver should work as well.

Image


After removing the old connectors feed the new connector down between the intake runners and align it using the screwdriver to push it down into the sensor. Once that end is plugged in you can router the rest under the intake runner and run it around to the left side and plug it into the harness. I used a long pick up tool in order to grab the other connector end pull it up. You can use a wire hanger and bend the end into a small hook to fish out the connector from under the intake runner.

once that's all connected you can reassemble the intake.
when tightening the 12mm bolts don't snug them all down right away. tighten them down loosely until they bottom out on the intake and then tighten them following a star pattern to prevent any leaks. There is an order to do it in thel shop manual but they don't even follow that at the dealer all the time.

Picture of old harness

Image


The estimated time to do this shouldn't be any more then an hour but time varies.

I've done these before so it took me about 30 minutes and that include me taking pictures during the whole process.

Think of the money you save and the next time it happens it will be a cinch to do.
 
#5 ·
Thanks

Even though it was some time ago, I wanted to also say "thank you" for your post. I have a knock sensor error that appeared while we were on vacation. About the same time a mouse that was nested in my golf bag got loose in the van and died in the cabin just above the in-cabin air filter. I don't think it chewed on the wire and the timing was coincidental, but I will soon see I suppose.

-Matt
 
#6 ·
Glad to see this post helped some fellow members. I've been lucky we haven't had to replace the sensor since the last time I changed it.

I did have a mouse get into our heater system through the fresh air vent under the windshield cowling. Lucky for me the cabin filter kept it from getting into the ducts but it left a lot of mouse droppings and urine which was a real pain to clean out of the blower motor.

Tip to others if you don't drive your van quite so often like us or maybe just to reduce the chance of mice getting in turn on your recirc before you shut the van off. This will keep them from getting in through the fresh air vent into the cabin.
 
#7 · (Edited)
Turns out it was chewed through

Well, I guess the timing was not coincidental at all. I found mouse poop on the battery so one had obviously been in the engine compartment. Then I found the wire pretty much gone. I have to order the part as it's not in stock. ~$14. What I didn't expect to find was that the knock sensor was broken. The knock sensor is $33 at Auto Zone or $40+ at the dealership. So the Odyssey will be out of commission for a few days, but luckily my dad has an old Toyota Camry we can borrow.

Also here are a few pictures. Included is a picture of how I made a 1/4" socket driver for my cordless drill. It's not strong enough to break most bolts or nuts loose, but it's still handy. The hand-held socket driver was a broken one in a toolbox someone had given me.

Thanks again for the post. It has been very helpful. Also, your picture of the part itself came in handy as the guy at the parts desk didn't know how to find anything beyond the sensor itself. But when I read him the part # off you picture he was able to find it was a wire assembly...Thanks!

Matt
 

Attachments

#8 ·
Difference in an '04 vs. an '08 knock sensor

Hi,

These look like great instructions and was following them dutifully on my '04 Odyssey. But, I'm wondering of the '04 is different than the '08 in that the other end of my knock sensor wires seem to disappear into the wrapped wiring harness and not a nice connector. Did the '04's not have the same connectors as the '08? - or is it a matter of unwrapping the insulation off the harness to uncover the connector (I did some of this - and it doesn't look promising). Hope that the fix for this isn't a full wire harness replacement.
 
#9 ·
Interesting that all the online parts stores say this harness (part# 30531-R70-A00) is only for the 2011 and newer Odys (as well as the newer Pilots and Ridgelines). But since it worked in the OP's 2008 I'll order it for my 2005. Good news is, I managed to catch the little bugger with a trap the other night! ScanGuage II gave me the code and Odyclub gives me the fix. Part is $5.98 + $2.24 shipping. Should make for a fun Saturday morning of wrenching.
 
#12 ·
Didn't work out so well for me. Thanks to the OP for this post, great info, but my case just got ugly.
When I finally got access to the wire I found that it was completely gone - nothing but the connectors was left.
As I tried to remove the bottom connector, it just sort of fell to one side, exposing an obviously broken off socket - like mdclermont found.
Looks to me like it would be very tough to get to and remove/replace. Should I keep digging or button it up and punt to the dealer?
 
#14 ·
Yep, thanks. Pulling the injector rail and putting a swivel connector on a deep 24mm socket I was able to get it out. Putting the new one in was tricky, but I was able to hold it inside the socket with a paper shim and then thread it into place.
Then came the wonderful realization that my replacement knock sensor wire is the wrong one! Oh joy. Connector at the sensor end is nowhere near the same. Guess I'll see the parts counter people tomorrow.
 
#16 ·
Everything went well. Sensor came out in two pieces and wire was crunchy and burned. I'm hoping that was my problem.
only issue I had was dealing with fuel rail. Prior to starting I blew the engine bay as clean as possible with compressed air but the fuel rail holes were caked full of dirt. I electrical taped a tiny fish tank hose to my shop vac and got as much dirt as possible then used about 30 Q-tips soaked in wd40 to wipe the holes as clean as possible trying not to let any dirt fall into the holes. I stuck the vac into each hole and used vac one more time just in case anything fell directly down then lubed the o-rings with 75w90 gear oil I had on hand. I didn't know what else to use and saw some people used it as lube. Just shy of 3 hours later taking my time and searching for o-ring lube ideas I had it back together and took it around a couple blocks. So far so good. Hopefully that was the issue to my knock sensor fault.

Ryan
 
#19 · (Edited)
Photobucket makes you pay to view embedded photos. I hope not a soul ever pays them one dime. They have ruined tons of information that used to be posted all over the Internet.

Actually, they make you pay to allow you to host files for 3rd party websites. Photobucket sucked everyone in then pulled their services and are trying to milk everyone for money.
 
#21 ·
The knock sensor is buried under the lower intake manifold runners. It's not difficult to get to them but there's a fair amount of disassembly. There is only one wire to the knock sensor so it's not real complicated either.
 
#22 ·
Hello,

I've had a few people message me about the pics to this thread. I haven't had my Odyssey for close to 8 years now, but luckily I still have the pictures. I created a photo album under my ody profile that contains the pictures for anyone who is looking for them. I also include the picture to the tools I used to replace the knock sensor. If you have the tools I listed that should be all you need to do the repair on a similar odyssey. I highly recommend taping over the intake runners once you get the top intake off so you don't accidentally drop anything down the runners or that that will ruin your day.

Hope this helps.
 
#30 ·
Hello SFGadgetGuy,
Many thanks for posting this. I have seen few YT videos but your description encouraging me to tackle my knock sensor issue because you sound it not so scary.
My question for the fellow members: My P0325 engine light comes and goes, often goes away the next day or two and reappears after a week or so, and often I don't see it for several months. So, before opening up the intake I seek your thoughts on the possible reasons behind this symptom and anything else to check first on my '08 ODY. You can rule out mouse issue. Thanks guys.
 
#31 ·
I had the apparently common pack rat chewing of the knock sensor harness on our 2011. Thanks SFGG for the helpful post to replace this without removing the intake manifold! Even though mine had the "rodent proof" covering, it was still completely chewed up. I contemplated wrapping the new one in tin foil or something to prevent future problems, but I came up with another idea. Instead, I found an appropriate spring in my junk pile, stretched it out to a good length, and wound it around the new knock sensor harness. We'll see how this works out!
Image